WPML makes it easy to build multilingual sites and run them. It’s powerful enough for corporate sites, yet simple for blogs.
Molongui Authorship and WPML work smoothly together, making it easy to translate author profiles. You can translate all templates and “static texts”.
To translate author profiles, you will need WPML core plugin and WPML String Translation and WPML Translation Management add-ons. They all come with the Multilingual CMS package.
Translating User Profiles
If you translate your posts content, it makes sense to translate author information too. To translate user profiles just follow the steps below:
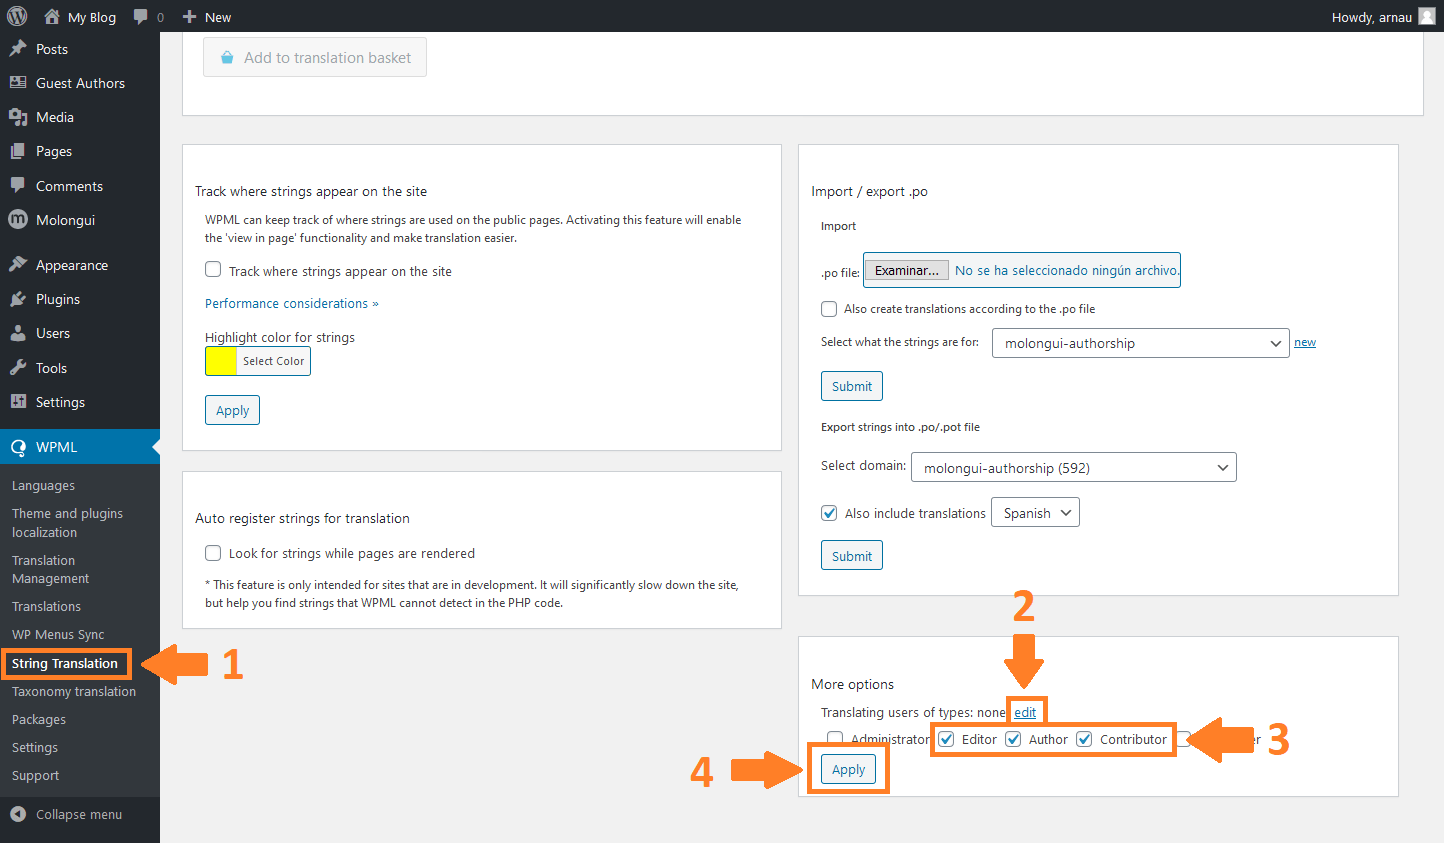
- Go to WPML > String Translation
- Scroll down to the “More options” section.
- Click the “edit” link.
- Choose the roles that are supposed to have their profile fields translated.
- Click the “Apply” button to save changes.
- Refresh the page
- Select “Authors” option for the “In domain” input at the top of the page.
- Now all translatable author fields will be displayed.
Keep in mind that if you don’t have any translatable field filled in, nothing will be listed.
Translating Guest Profiles
If you have guest authors on your site, it makes sense to translate their info too.
To translate guest profiles you can either switch edit-screen language to the one you want to translate content to or use the WPML Translation Editor. Both options are easy but Translation Editor is recommended. However, if you need to fill in any field that is empty in the base language, you need to use the guest author edit-screen.
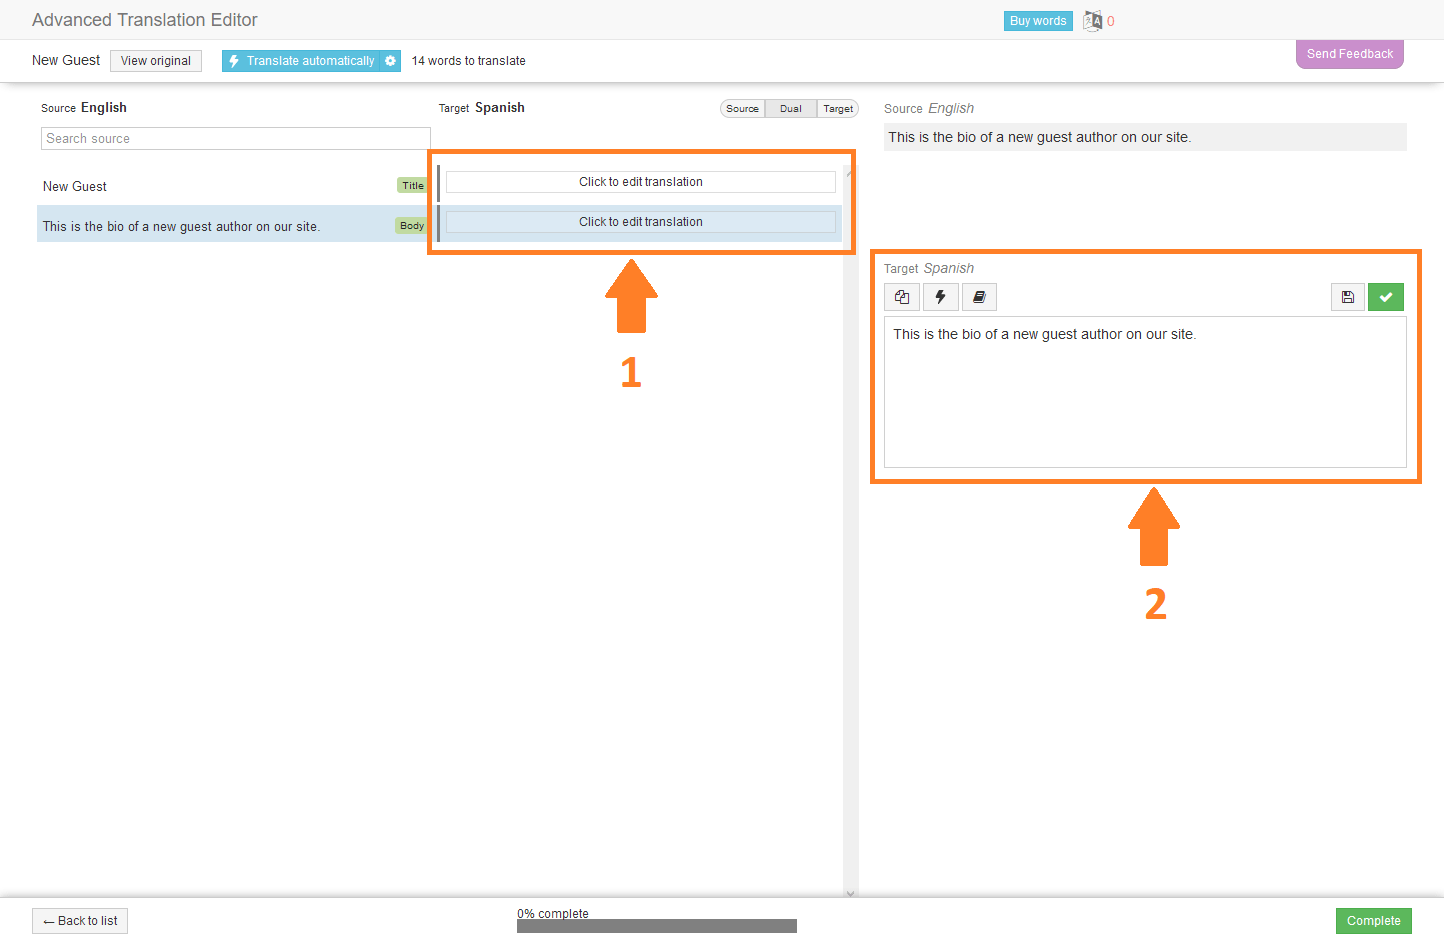
Using the WPML Translation Editor
- Go to the guest author edit-screen.
- Look for the Language right sidebar panel.
- Check the Duplicate featured image to translations checkbox if you want to share author picture among translations.
- Switch ON the Use WPML’s Translation Editor option.
- Click on the Plus icon towards the language you want to translate the guest profile to. You will be redirected to the WPML Translation Editor page.
- Translate the available fields.
- Click on the Save & Close button when done.
Using the guest author edit-screen
- Go to the guest author edit-screen.
- Look for the Language right sidebar panel.
- Check the Duplicate featured image to translations checkbox if you want to share author picture among translations.
- Click on the Plus icon towards the language you want to translate the guest profile to. The page will reload with all the fields empty.
- Fill out the guest author profile in the translated language.
- Click on the Publish/Update button when done.
Translating Author Box Strings
Molongui Authorship allows you to customize and translate text strings used on the author box. You will find that option under: Molongui > Authorship Settings > Author Box > Translate. That works great if you have a monolingual site.
But if you need to translate them to several languages, then you can use WPML tools by following the steps below:
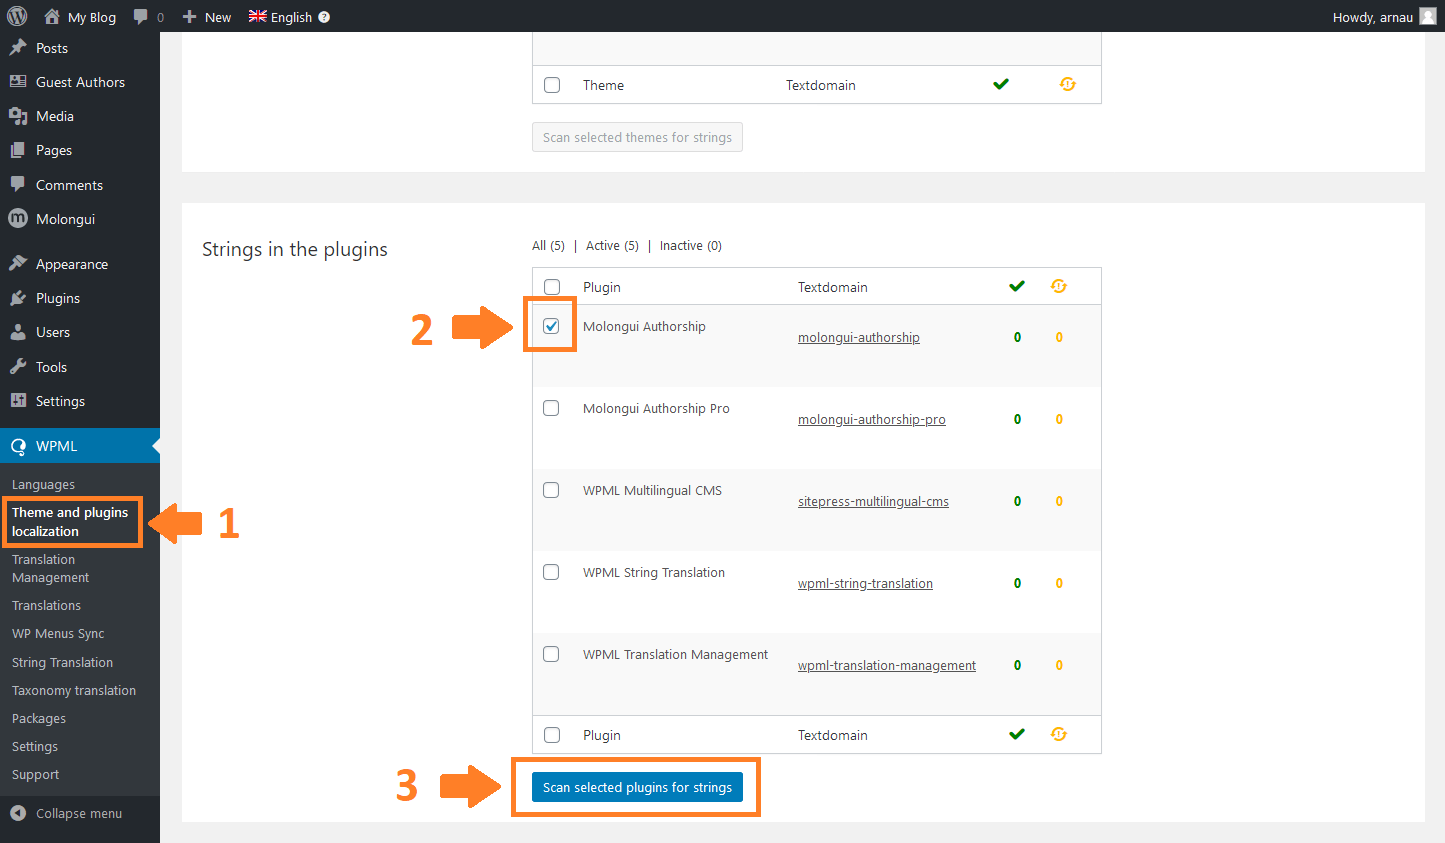
- Scan plugin strings by going to WPML > Theme and plugins localization. Select Molongui Authorship plugin by checking the box and click on Scan selected plugins for strings button.
- Go to WPML > String Translation
- Select admin_texts_molongui_authorship_strings as the domain
- All strings used in the author box will be listed. Click on the plus/pencil icon on the right that belongs to the language you want to translate to and input the translation on the popup that displays. Hit Enter key to save.
Translating Admin Strings
You might want to translate other strings, like the ones displayed on admin pages. If that is the case, you can use WPML tools by following the steps below:
- Scan plugin strings by going to WPML > Theme and plugins localization. Select the “Molongui Authorship” plugin and click on Scan selected plugins for strings button.
- Go to WPML > String Translation
- Select molongui-authorship as the domain.
- All strings from the plugin will be listed. You can either translate one by one or use the Search for: input on the top to search for a particular string you need to translate.
- Click on the plus/pencil icon on the right that belongs to the language you want to translate to and input the translation on the popup that displays. Hit Enter key to save.
If you don’t find a string, repeat steps above selecting molongui-common-framework domain in step 3.